How to perform the wireless LAN setup using WPS connection (Macintosh)
FAQ ID: 8200822100
Release date: 11 June 2010
Solution
Wireless Setup
NOTE
Before connecting the machine to the network, make sure that the computer and access point or router is connected.
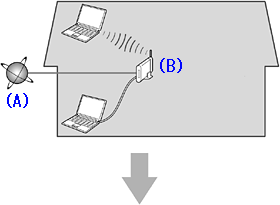
Add (connect) the machine to the network.
A: Internet
B: Access point or wireless router, etc.
- Notes on Wireless Connection
- The configuration, router functions, setup procedures and security settings of the network device vary depending on your system environment. For details, refer to your device's instruction manual or contact its manufacturer.
- In an office setup, consult your network administrator.
- If you connect to a network that is not protected with security measures, there is a risk of disclosing data such as your personal information to a third party.
- If an error message appears or if you have trouble with the network connection, refer to the printed manual: Network Setup Troubleshooting.
- Place the machine and computer on the same network segment.
NOTE
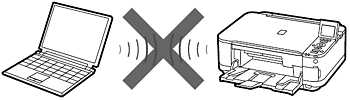
An "Ad-hoc connection," which establishes a direct connection to the computer over a wireless connection without using an access point, is not supported. Be sure to prepare an access point.
Wireless Setup Using WPS (Wi-Fi Protected Setup)
1.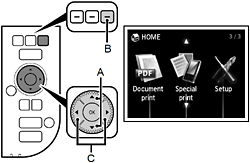
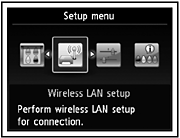
Use the
 or
or  button (A) to display Setup, then press the right FUNCTION button (B).
2.
Use the  or
or  button (C) to select Wireless LAN setup, then press the OK button.
3.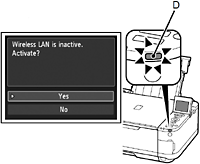
Select Yes, then press the OK button.
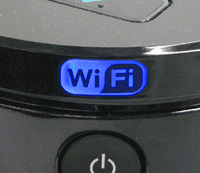
When wireless connection is enabled, the Wi-Fi lamp (D) lights blue.
4.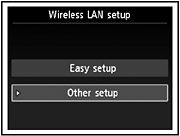
Select Other setup, then press the OK button.
5.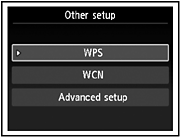
Select WPS, then press the OK button.
6.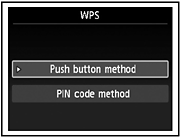
Select Push button method, then press the OK button.
7.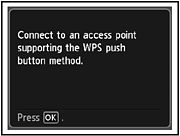
Press the OK button.
NOTE
- To use the PIN code method for setup, select PIN code method in 6, then press the OK button. Follow the on-screen instructions to operate the machine and access point. When the screen in 9 appears, press the OK button. If the setup is not completed within 10 minutes and the timeout error screen appears, press the OK button to perform the setup again and set the new PIN code displayed on the screen to the access point. If the timeout error screen appears even though the setup has been completed within 10 minutes, select the method other than the PIN code method to perform the wireless LAN.
8.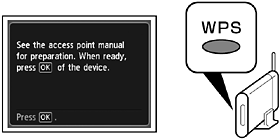
Press and hold the WPS button on the access point (for about 5 seconds), then press the OK button on the machine within 2 minutes.
For details on the WPS button pressing, refer to the manual of your access point.
The Wi-Fi lamp (blue) flashes while searching for or connecting to an access point.
9.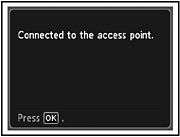
When the above screen appears, press the OK button.
IMPORTANT
- If the timeout error screen appears, press the OK button, then start over from 8.
- If an error message appears, refer to the printed manual: Network Setup Troubleshooting.
Install the Software (Network Connection)
- To use the machine by connecting it to a computer, software including the drivers needs to be copied (installed) to the computer's hard disk. The installation process takes about 20 minutes. (The installation time varies depending on the computer environment or the number of application software to be installed.)
IMPORTANT
- Quit all applications before installation.
- Log on as the administrator (or a member of the Administrators group).
- If the firewall function of your security software displays a warning message, set the security software to always allow access.
1. 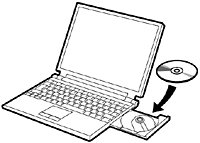
Turn on the computer, then insert the Setup CD-ROM into the CD-ROM drive.
2. 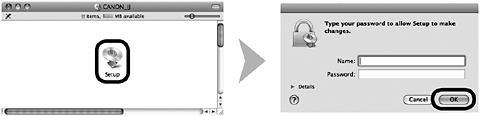

Double-click the Setup icon of the CD-ROM folder to proceed to the following screen. Enter your administrator name and password, then click OK.
If the CD-ROM folder does not open automatically, double-click the CD-ROM icon on the desktop.
If you do not know your administrator name or password, click the help button, then follow the on-screen instructions.
3.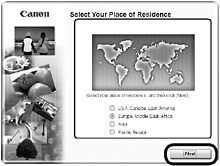
Select your place of residence, then click Next.
NOTE
- If the Select Language screen appears, select a language, then click Next.
4.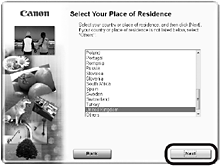
Select a country or region, then click Next.
5.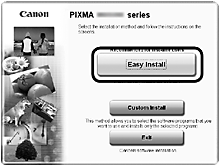
Click Easy Install.
The drivers, application software, and on-screen manuals are installed.
NOTE
- If you want to select particular items to install, click Custom Install.
6.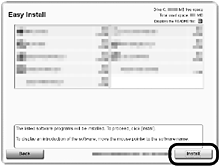
Click Install.
7.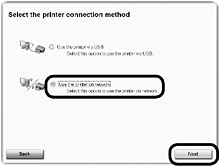
Select Use the printer on network, then click Next.
Follow any on-screen instructions to proceed with the software installation.
8.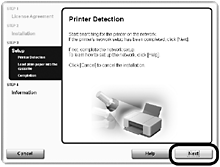
When the Printer Detection screen appears, click Next.
NOTE
- If the Printer Connection screen appears instead of the screen above, the connection method is not correctly selected in 7.
- Follow on-screen instructions and proceed with the installation. Click Exit on the installation complete screen, then start again from 2 and be sure to select Use the printer on network in 7.
9.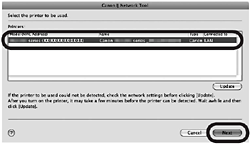
On the Canon IJ Network Tool screen, select MG5200 series in Printers, then click Next.
NOTE
- If the machine is not detected, refer to the printed manual: Network Setup Troubleshooting. Make sure there is no problem, then click Update.
Registration
NOTE
- The alphanumeric characters after Canon MG5200 series is the machine's Bonjour service name or MAC address.
- If the machine has not been detected, make sure of the following.
- The machine is turned on.
- The firewall function of any security software is turned off.
- The computer is connected to the access point.
1.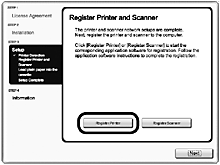
When the Register Printer and Scanner screen appears, click Register Printer.
Mac OS X
v.10.6.x v.10.5.x -> Go to 2-A
v.10.4.11 -> Go to 2-B
2-A Mac OS X v.10.6.x/v.10.5.x
Mac OS X v.10.4.11 -> 2-B
(1)
Select Canon MG5200 series canonijnetwork and click Add.
-> Go to 3
2-B Mac OS X v.10.4.11
(1)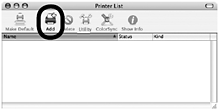
When the Printer List window appears, click Add.
NOTE
- When the You have no printers available. screen appears, click Add.
(2)
Click More Printers in the Printer Browser window.
(3)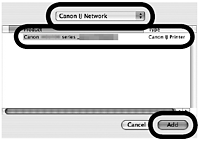
Select Canon IJ Network in the pop-up menu, select Canon MG5200 series in the list of printers, then click Add.
(4)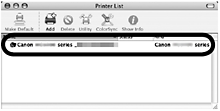
Make sure that Canon MG5200 series is added to the list of printers.
-> Go to 3
3.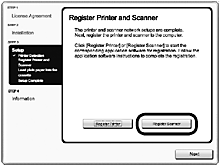
When the Register Printer and Scanner screen appears, click Register Scanner.
4.
Select Canon MG5200 series on the Scan-from-PC Settings screen, then click OK.
5.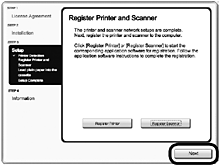
Click Next on the Register Printer and Scanner screen.
Install the Software (Information)
1.
Click Next.
Follow any on-screen instructions to proceed with the software installation.
- Important Information for the Installation
- Necessary Information for the User Registration
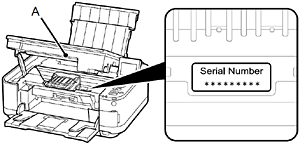
When the serial number is not displayed on the registration screen automatically, input the serial number located inside the machine (as shown in the illustration).
IMPORTANT
- If the power is on, the Print Head Holder will move when the Scanning Unit (Cover) (A) is opened.
NOTE
- The User Registration screen will only be displayed when Europe, Middle East, Africa is selected on the Select Your Place of Residence screen.
- If the Extended Survey Program screen appears
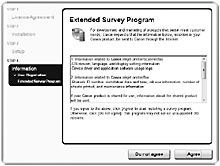
If you can agree to Extended Survey Program, click Agree.
If you click Do not agree, the Extended Survey Program will not be installed.
(This has no effect on the machine’s functionality.)
2.
Click Exit to complete the installation.
It is necessary to restart the computer before scanning using the Operation Panel on the machine for the first time.
3.
Solution Menu EX starts when clicking OK in the Canon Solution Menu EX dialog.
Remove the Setup CD-ROM and keep it in a safe place.
NOTE
- The buttons displayed on Solution Menu EX may vary depending on the country or region of purchase.
- Using the Machine from Additional Computers
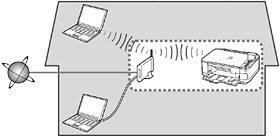
Now that the wireless connection of the machine is complete, it can be used from additional computers on the same network.
Install software including the drivers on the computer from which you want to use the machine. Other settings are not required.
To add computers from which to use the machine, go to [ Use from Additional Computers ]
Use from Additional Computers
NOTE
- If the machine is already connected to a wireless connection, it can be used from additional computers on the same network.
To use from additional computers
1. Insert the Setup CD-ROM into the computer from which you want to use the machine.
2. Follow the on-screen instructions to install the software.
Other settings are not required.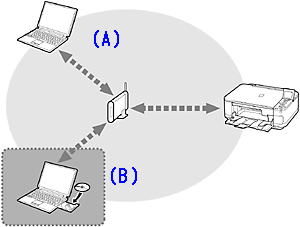
A: Computer from which the machine can be used currently
B: Additional computers on the same network It enables the computer to use the machine.
NOTE
- For details on the software installation procedure, refer to [ How to perform the wireless LAN setup so that other computers can share the same printer (Macintosh) ]
Applicable Models
- PIXMA MG5240
- PIXMA MG5250