Installing the Software from the EOS DIGITAL Solution Disk (Included on the CD-ROM / Downloadable from the Canon Homepage)
FAQ ID: 8202593400
Release date: 18 May 2015
Solution
The EOS DIGITAL Solution Disk (CD-ROM) contains various applications for EOS digital cameras.
For the features of each application, please refer to the Software Instruction Manual (included on the CD-ROM that came with your camera or downloadable from the Canon homepage).
ATTENTION
- Never connect the camera to your computer before you install the software. The software will not be installed correctly.
- Even if the previous version of the software is installed, install the software by following the steps below (the current software will overwrite the previous version).
- If errors occur during installation, please see the 'Related information' section at the end of the page.
IMPORTANT
With EOS DIGITAL Solution Disk Ver. 25 or later, you can automatically download and install additional software for the camera you are using from the Internet.
- An environment in which you can connect to the Internet (in which you have an agreement with an Internet Service Provider, have browser software installed, and have made the various network connections) is necessary to use this function.
- Just as with general Internet usage, depending on your computing environment, connection fees or telecommunication fees may be charged separately by your Internet Service Provider.
Installing the software from the EOS DIGITAL Solution Disk
1. Turn your computer on.
2-A: Installing from the CD-ROM.
2-A-1. Insert the EOS DIGITAL Solution Disk (CD-ROM) into the computer.
2-A-2. If the following window appears, click [Run SETUP.EXE].
If you are using a Macintosh computer, double-click the CD-ROM icon on the desktop, and then double-click [Setup].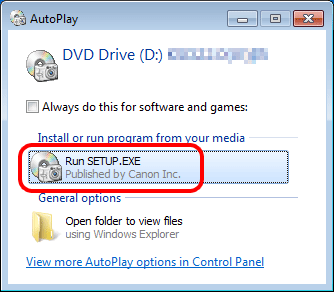 Proceed to step 3.
2-B: Installing the EOS Digital Solution Disk Software after downloading it from the Canon homepage.
2-B-1. Double-click the downloaded file.
2-B-2. The contents of the file will be unpacked. Double-click [ksdxxxxx.exe] located inside the newly created folder.
2-B-3. The following screen will be displayed. Click [Run]. Proceed to step 3.
3. Select the area in which you live.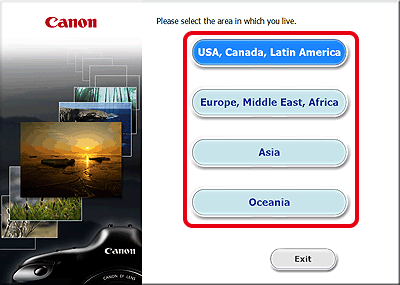
4. Select the country where you live, and then click [Next].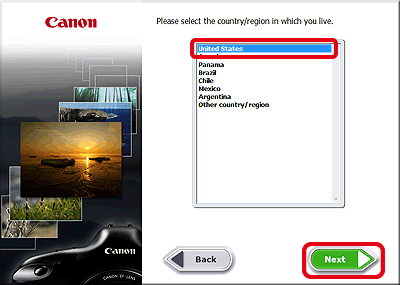
5. If a language setting screen appears, select the desired language from the options displayed.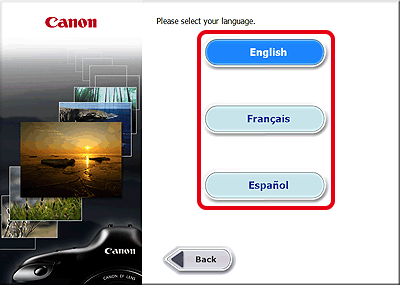
6. Click [Easy Installation] (to install all applications included on the Solution Disk).
To select the software you want to install, click [Custom Installation]. For details, please see 'Installing only the necessary software' below.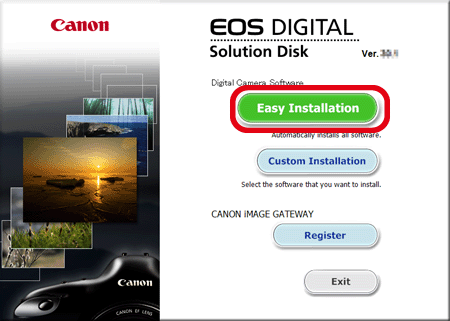
7. Close any other applications, and then click [OK].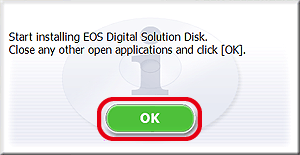
8. Click [Install].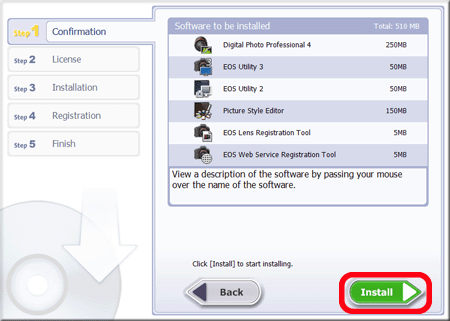
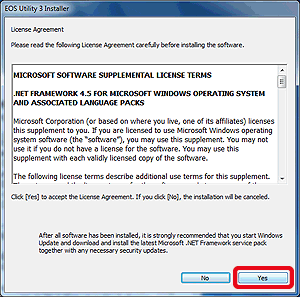
9. Click [Yes] to accept the License Agreement.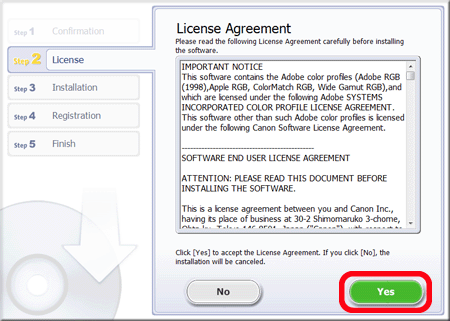
IMPORTANT
- On some models, the [User Account Control] screen may be displayed. In this case, please click [Yes].
- Installation of Microsoft .NET Framework 4.5 is required to run the software in Windows 7. If Microsoft .NET Framework 4.5 is not installed on your computer, please read the license agreement and if you agree to the terms, click [Yes] to install Microsoft .NET Framework 4.5.
10. The following window appears, and installation starts.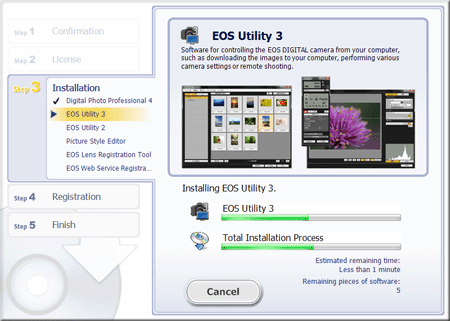
11. Click [Next].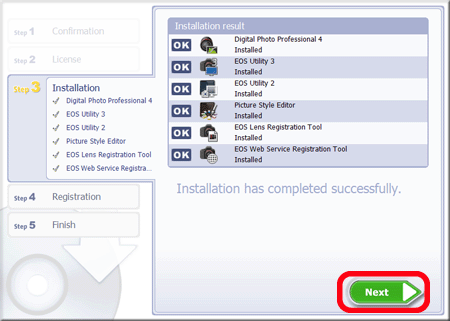
12. The following screen appears.
In this example [No, I will register later] has been selected, and [Next] has been clicked.
(To register in CANON iMAGE GATEWAY, select [Yes, I would] and complete the registration procedure.)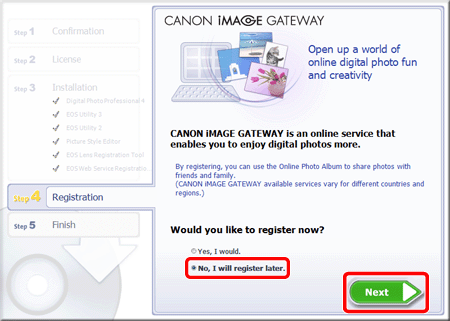
13. Click [OK].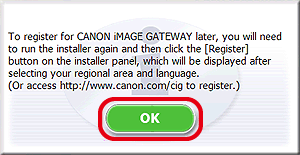
14. Click [Finish].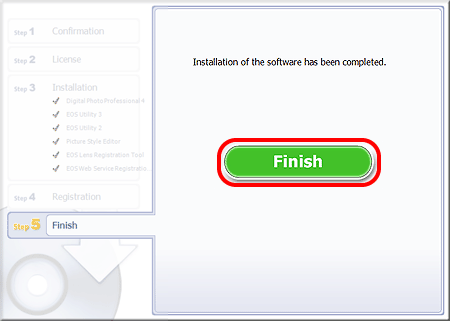
If a message appears prompting you to restart the computer, click [Restart]. If you installed the software from a CD-ROM, please remove the CD after the computer restarts.
This completes the procedure for installing the software from the EOS DIGITAL Solution Disk
When using EOS Utility, it is necessary to connect the camera to the computer before starting EOS Utility. For details on how to connect the camera to the computer, please refer to the camera’s instruction manuals.
Installing only the necessary software
To install only the necessary software, please follow the steps below.
1. Turn your computer on.
2. Insert the EOS DIGITAL Solution Disk (CD-ROM) into the computer.
If the following window appears, click [Run SETUP.EXE].
If you are using a Macintosh computer, double-click the CD-ROM icon on the desktop, and then double-click [Canon EOS Digital Installer].
3. Select the area in which you live.
4. Select the country where you live, and then click [Next].
5. If a language setting screen appears, select the desired language from the options displayed.
6. Click [Custom Installation].
7. Close any other applications, and then click [OK].
8. In the [Software to be installed] window, select only the software to be installed (  ), and then click [Next].
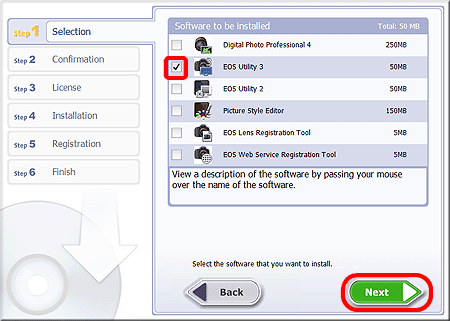
9. Click [Install].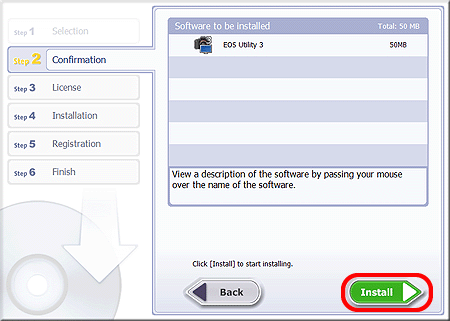
10. Click [Yes] to accept the License Agreement.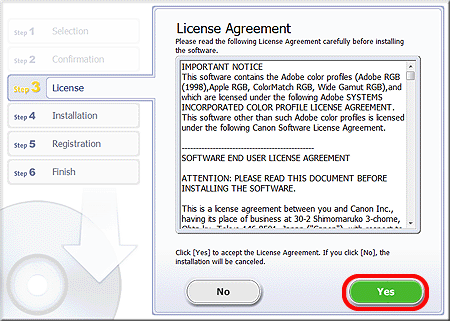
IMPORTANT
- On some models, the [User Account Control] screen may be displayed. In this case, please click [Yes].
- Installation of Microsoft .NET Framework 4.5 is required to run the software in Windows 7. If Microsoft .NET Framework 4.5 is not installed on your computer, please read the license agreement and if you agree to the terms, click [Yes] to install Microsoft .NET Framework 4.5.

11. The following window appears, and installation starts.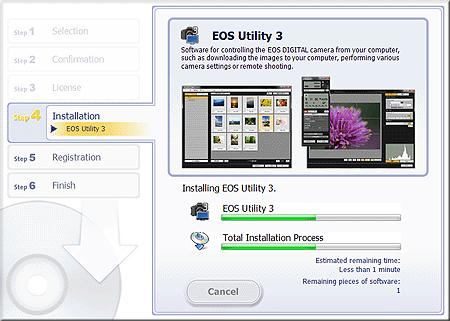
12. Click [Next].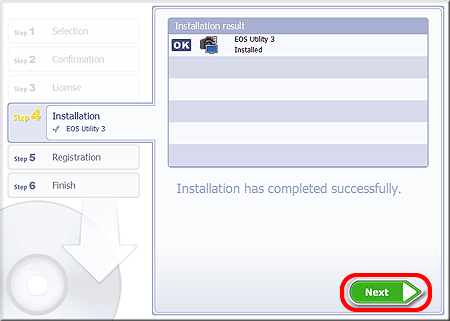
13. The following screen appears.
In this example [No, I will register later] has been selected, and [Next] has been clicked.
(To register in CANON iMAGE GATEWAY, select [Yes, I would] and complete the registration procedure.)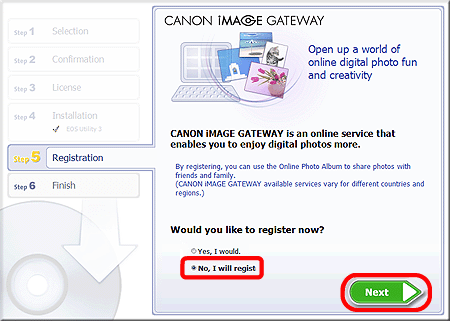
14. Click [OK].
15. Click [Finish].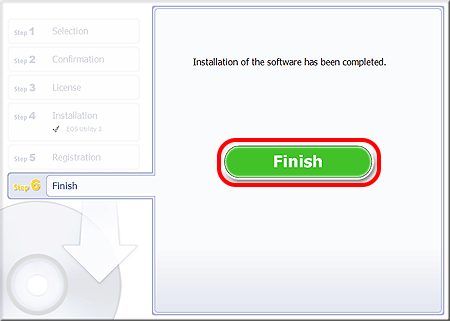
If a message appears prompting you to restart the computer, click [Restart]. If you installed the software from a CD-ROM, please remove the CD after the computer restarts.
This completes the procedures for installing only the necessary software.
When using EOS Utility, it is necessary to connect the camera to the computer before starting EOS Utility. For details on how to connect the camera to the computer, please refer to the camera’s instruction manuals.
Related information
Applicable Models
- EOS 5DS
- EOS 5DS R
- EOS 750D
- EOS 760D