How do I Direct Print using the camera and a PictBridge compatible printer?
FAQ ID: 8202751900
Release date: 05 October 2017
Solution
Print your shots directly from your camera by connecting the camera to a PictBridge-compatible printer (sold separately) with a USB cable.
Also, you can make direct prints when connecting to PictBridge compatible-printers, regardless of manufacturers or models.
IMPORTANT
- Some cameras do not come with USB cables.
- If you do not have a USB cable, buy a USB cable separately.
- With compact digital cameras, you can use the following 2 types of USB cables.
* The cable types that you can use depend on the device model. Refer to the camera user manual.
- USB cable (IFC-400PCU) for the [Mini-B] camera terminal
- USB cable (IFC-600PCU) for the [Micro-B] camera terminal
Checking Your Printer Model
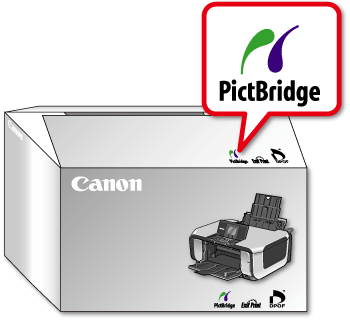
The logos below indicate that the printer is PictBridge-compatible.These logos mean that you can connect your camera and printer, and print directly from the camera. Check the printer body, packaging or user manual.
NOTE
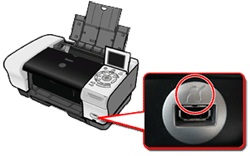
- Also, the PictBridge logo may be found on the printer unit.
Printing Directly from the Camera
Follow the steps below to print by connecting the camera to a PictBridge-compatible printer (sold separately) with a USB cable.IMPORTANT
- The position and shape of the operation buttons, screens displayed, and setting items may differ according to the model you use.
- The procedure is shown on a PowerShot ELPH 180 / IXUS 175 for the purposes of explanation.
- A Canon SELPHY CP series compact photo printer is used here for the sake of illustration. Screens displayed and available functions vary by printer. Also refer to the printer manual for additional information.
1. Make sure the camera and printer are off.
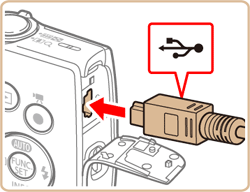
2. Connect an interface cable to the camera's [A/V OUT / DIGITAL Terminal]. Connect the other end of the cable to printer's USB terminal.
- Open the cover. Holding the smaller cable plug in the orientation shown, insert the plug fully into the camera terminal.
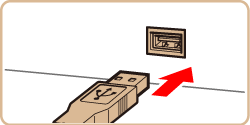
- Connect the larger cable plug to the printer. For other connection details, refer to the printer manual.
3. Turn the printer on.
4. Press the [Playback] ( ) button to turn the camera on.
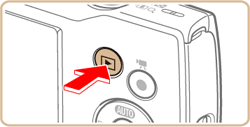
- The following screen appears.
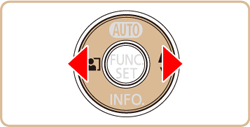
5. Press the [  ], [
], [  ] buttons to choose an image.
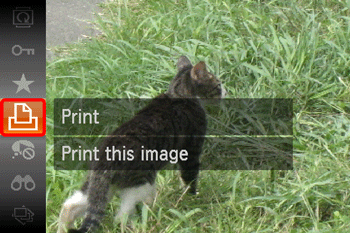
6. Press the [  ] button, choose [Print] (
 ), and press the [
  ] button again.

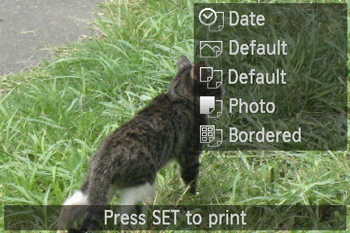
7. The screen for specifying the print settings appears.
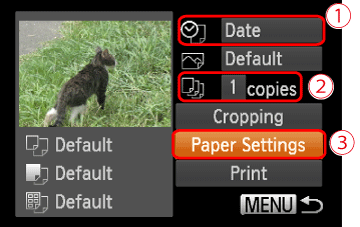
 : Press the [
  ], [
], [  ] buttons to select [Date] for adding the date.
 : Press the [
  ], [
], [  ] buttons to specify the number of prints.
 : Choose [Paper Settings], and then press the camera's [
  ] button.
8. The screen for setting the paper size appears.
Press the [  ], [
], [  ] buttons to choose the paper size, then press the camera's [
  ] button.
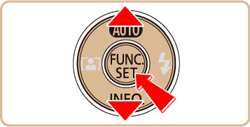
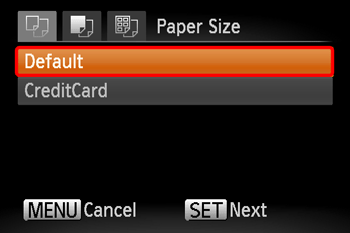
- In the image shown above, the [Default] size is selected.
9. The screen for setting the paper type appears.
Press the [  ], [
], [  ] buttons to choose the paper type, and then press the camera's [
  ] button.
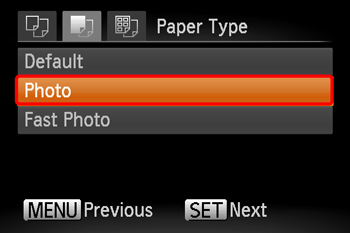
- In the image shown above, [Photo] is selected.
10. The layout settings screen appears.
Press the [  ], [
], [  ] buttons to choose the layout type, and then press the camera's [
  ] button.
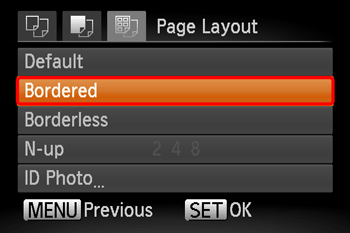
- In the image shown above, [Bordered] is selected.
11. Return to the printing screen.
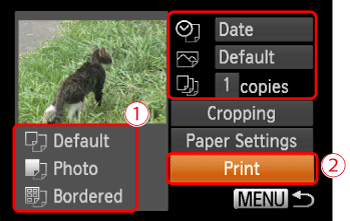
 : Make sure that the settings are correct.
 : Choose [Print] and press the camera's [
  ] button to start printing.
Applicable Models
- IXUS 160
- IXUS 170
- IXUS 175
- IXUS 177
- IXUS 180
- IXUS 182
- IXUS 185
- IXUS 190
- IXUS 275 HS
- IXUS 285 HS
- PowerShot G1 X Mark III
- PowerShot G7 X Mark II
- PowerShot G9 X Mark II
- PowerShot SX400 IS
- PowerShot SX410 IS
- PowerShot SX420 IS
- PowerShot SX430 IS
- PowerShot SX432 IS
- PowerShot SX520 HS
- PowerShot SX530 HS
- PowerShot SX610 HS
- PowerShot SX620 HS
- PowerShot SX710 HS
- PowerShot SX720 HS
- PowerShot SX730 HS