Switching Shooting Modes
FAQ ID: 8201996200
Release date: 25 December 2015
Solution
The procedure for switching shooting modes is explained below.
IMPORTANT
The position and shape of the operation buttons, screens displayed, and setting items may differ according to the model you use.
Switching to Auto (Smart Auto) Mode
1. Press the power button to turn the camera on.
2. Press the < > button repeatedly until [AUTO] is displayed.


Aim the camera at the subject. The camera will make a slight clicking noise as it determines the scene.
- PowerShot ELPH 150 IS / IXUS 155 / PowerShot ELPH 140 IS / IXUS 150 - Icons representing the scene and image stabilization mode are displayed in the upper right of the screen.
- PowerShot ELPH 135 / IXUS 145 - A scene icon is displayed in the upper right of the screen.
・Frames displayed around any detected subjects indicate that they are in focus.

Switching to Specific Scenes Mode
1. Press the power button to turn the camera on.
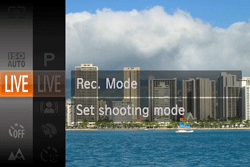
2. Press the < > button repeatedly until [
  ]* is displayed.
*[  ] is displayed as the default mode after purchase. If the settings have been changed, the selected shooting mode will be displayed.


3. Press the <FUNC./SET> ( ) button, choose [Shooting Mode] in the menu, and choose the desired option.

The available shooting modes are listed below.
| Scene | Shooting mode | Effect | |
| Shooting in Various Conditions | Shoot portraits | [Portrait] ( ) ) |
Take shots of people with a softening effect. |
| Shoot under low light | [Low Light] ( ) ) |
Shoot with minimal camera and subject shake even in low-light conditions. | |
| Shoot with snowy backgrounds | [Snow] ( ) ) |
Bright, natural-colored shots of people against snowy backgrounds. | |
| Shoot fireworks | [Fireworks] ( ) ) |
Vivid shots of fireworks. | |
| Brightness / Color Customization | [Live View Control] ( ) ) |
Image brightness or colors when shooting can be easily customized as follows. | |
| Shooting with Reduced Motion Blur* | [Digital IS] ( )* )* |
Shoot with minimal camera and subject shake. In scenes where the flash is not fired, consecutive shots are combined to reduce camera shake and noise. | |
| Applying Special Effects | Shooting with a Fish-Eye Lens Effect | [Fish-eye Effect] ( ) ) |
Shoot with the distorting effect of a fish-eye lens. |
| Shots Resembling Miniature Models | [Miniature Effect] ( ) ) |
Creates the effect of a miniature model, by blurring image areas above and below your selected area. | |
| Shooting with a Toy Camera Effect | [Toy Camera Effect] ( ) ) |
This effect makes images resemble shots from a toy camera by vignetting (darker, blurred image corners) and changing the overall color. | |
| Shooting in Monochrome | [Monochrome] ( ) ) |
Shoot images in black and white, sepia, or blue and white. | |
| Shoot in vivid colors | [Super Vivid] ( ) ) |
Shots in rich, vivid colors. | |
| Posterized shots | [Poster Effect] ( ) ) |
Shots that resemble an old poster or illustration. | |
| Special Modes for Other Purposes | Using the Face Self-Timer | [Face Self-Timer] ( ) ) |
The camera will shoot about two seconds after detecting that the face of another person (such as the photographer) has entered the shooting area. This is useful when including yourself in group photos or similar shots. |
| Shooting Long Exposures | [Long Shutter] ( ) ) |
Specify a shutter speed of 1 - 15 seconds to shoot long exposures. In this case, mount the camera on a tripod or take other measures to prevent camera shake. | |
| Shooting in Program AE | [  ] Mode ] Mode |
You can customize many function settings to suit your preferred shooting style. | |
*PowerShot ELPH 135 / IXUS 145 only
This completes the steps for switching shooting modes.
Applicable Models
- IXUS 145
- IXUS 147
- IXUS 150
- IXUS 155
- IXUS 157