Installing Driver/Software (USB Connection)
FAQ ID: 8201986700
Release date: 28 November 2013
Solution
Install the software to use the machine.
The method of installation varies depending on the connection method or environment.
* If the User Software and Manuals CD-ROM (or DVD-ROM) is supplied with the machine, install the e-Manual from the User Software and Manuals CD-ROM (or DVD-ROM).
| OS | Connection method | Installation method |
| Windows | USB connection | "Installing Using [Easy Installation]"* "Installing Using [Custom Installation]" |
| When installing downloaded drivers | "Installing the Drivers Downloaded from the Canon Homepage" | |
- Connect the USB cable after installing the MF drivers. If you connected the USB cable before installing the MF drivers, refer to "MF Driver Installation Guide."
- Presto! PageManager is not installed by selecting [Easy Installation]. To install the software, select [Custom Installation].
IMPORTANT
User rights for logging on to Windows
- Log on as a user with administrative rights.
When installing via USB connection
- Connect the USB cable after the software installation. Make sure that the power of the machine is turned ON when connecting the USB cable.
Installing Using [Easy Installation]
1. Insert the User Software and Manuals CD-ROM (or DVD-ROM) into the slot on your computer.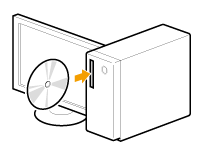
2. Click [Easy Installation].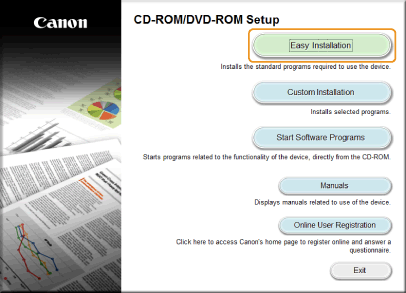
The options to be displayed differ depending on your country or region.
NOTE
If the language selection screen is displayed before the CD-ROM/DVD-ROM setup screen appears:
- Select the language and click [OK].
REFERENCE
If the above CD-ROM/DVD-ROM Setup screen does not appear:
- Windows XP and Server 2003
1. From the [Start] menu, select [Run].
2. Enter "D:\MInst.exe", and then click [OK].
- Windows Vista, 7, and Server 2008
1. Enter "D:\MInst.exe" in [Start Search] or [Search programs and files] under the [Start] menu.
2. Press the [ENTER] key on the keyboard.
- Windows 8 and Server 2012
1. Right-click the lower-left corner of the screen and select [Run].
2. Enter "D:\MInst.exe", and then click [OK].
* The CD-ROM (or DVD-ROM) drive name is indicated as "D:" in this manual. The CD-ROM (or DVD-ROM) drive name may differ depending on the computer you are using.
3. When the following screen appears, select [USB Connection], and click [Next].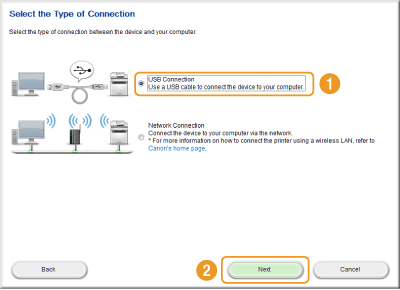
NOTE
Windows Server 2003/Server 2008/Server 2012
- This screen is not displayed. Proceed to the following procedure.
4. Click [Install].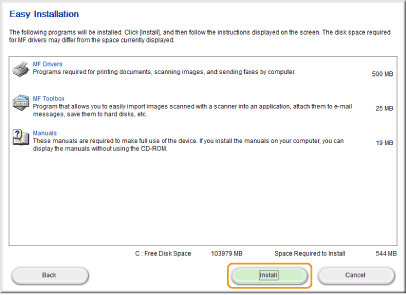
The options to be displayed differ depending on your country or region.
5. Read the License Agreement and click [Yes].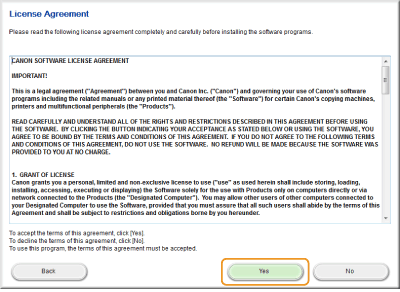
6. Click [Next].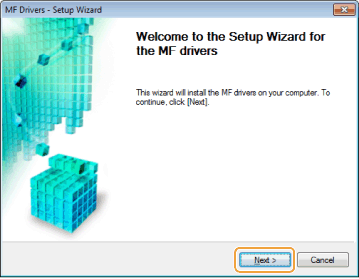
The following screen appears. Click [Yes].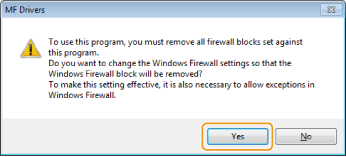
7. Click [Exit].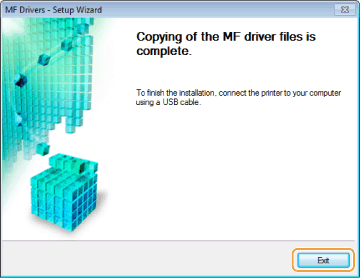
* Next, installation of MF Toolbox starts.
In Windows Server 2003/Server 2008/Server 2012, MF Toolbox is not installed. Proceed to step 10.
8. Click [Start].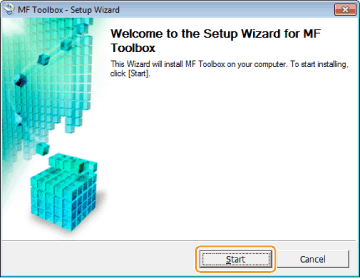
9. Click [Exit].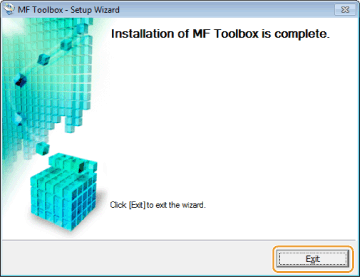
10. Follow on-screen instructions to install the manual.
11. When the following screen appears, read the displayed information, click [Accept] or [Do Not Accept], and then click [Next].
This screen may not be displayed depending on your environment.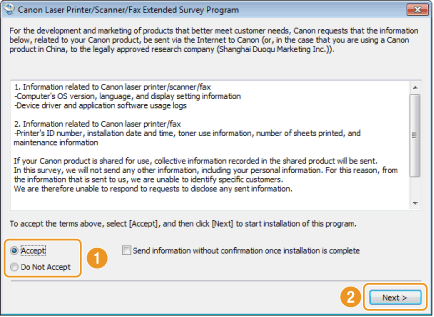
NOTE
If you select [Accept]:
- The Product Extended Survey Program (the program to investigate the state of usage) will be installed. The Product Extended Survey Program is the program to send the information related to the usage of this machine to Canon every month for ten years. Any other information including your personal information is not sent.
- You can also uninstall the Product Extended Survey Program. For more details, see "MF Driver Installation Guide".
12. Confirm that the application is selected [  ] under [Install] and click [Next].
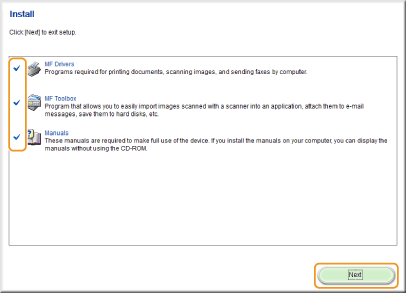
The options to be displayed differ depending on your country or region.
13. Restart your computer.
(1) Select the [Restart Computer Now (Recommended)] check box.
(2) Click [Restart].
- Remove the CD-ROM (or DVD-ROM) once this screen appears.
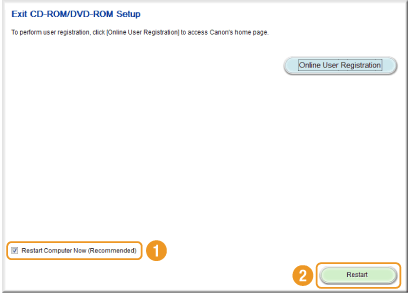
The options to be displayed differ depending on your country or region.
Installing Using [Custom Installation]
1. Insert the User Software and Manuals CD-ROM (or DVD-ROM) into the slot on your computer.
2. Click [Custom Installation].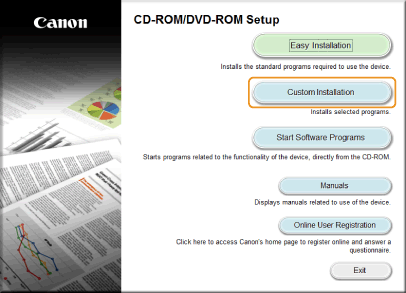
The options to be displayed differ depending on your country or region.
NOTE
If the language selection screen is displayed before the CD-ROM/DVD-ROM setup screen appears:
- Select the language and click [OK].
REFERENCE
If the above CD-ROM/DVD-ROM Setup screen does not appear:
- Windows XP and Server 2003
1. From the [Start] menu, select [Run].
2. Enter "D:\MInst.exe", and then click [OK].
- Windows Vista, 7, and Server 2008
1. Enter "D:\MInst.exe" in [Start Search] or [Search programs and files] under the [Start] menu.
2. Press the [ENTER] key on the keyboard.
- Windows 8 and Server 2012
1. Right-click the lower-left corner of the screen and select [Run].
2. Enter "D:\MInst.exe", and then click [OK].
* The CD-ROM(or DVD-ROM) drive name is indicated as "D:" in this manual. The CD-ROM(or DVD-ROM) drive name may differ depending on the computer you are using.
3. When the following screen appears, select [USB Connection], and click [Next].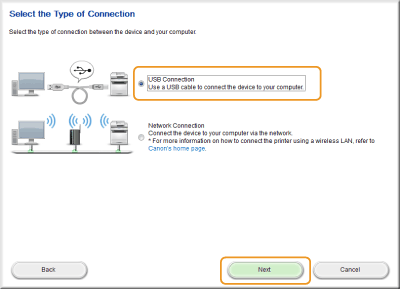
NOTE
Windows Server 2003/Server 2008/Server 2012:
- This screen is not displayed. Proceed to the following procedure.
4. Select the check box next to the application you want to install and click [Install].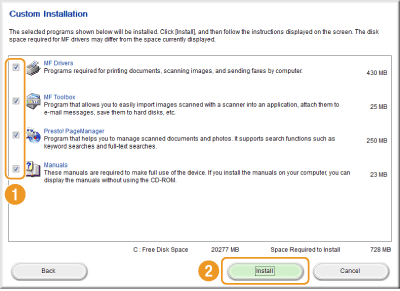
The options to be displayed differ depending on your country or region.
5. Read the License Agreement and click [Yes].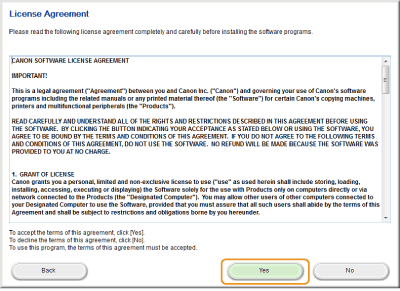
6. Click [Next].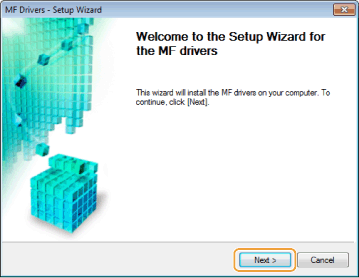
The following screen appears. Click [Yes].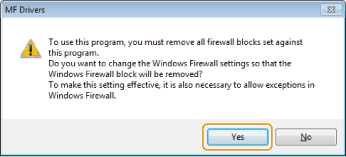
7. Click [Exit].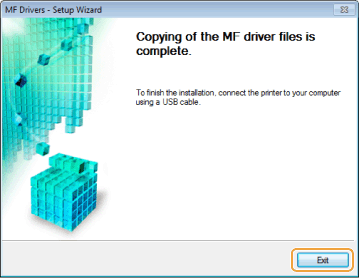
* Next, installation of MF Toolbox starts.
In any of the following cases, MF Toolbox is not installed.
- If you are using Windows Server 2003/Server 2008/Server 2012. Proceed to step 12.
- If you did not select the [MF Toolbox] check box in step 4. Proceed to step 10.
8. Click [Next].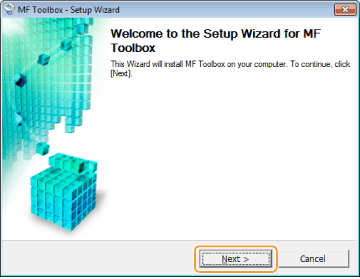
The screens for specifying a location in which the MF Toolbox is installed and position to which the start menu is added appear.
Specify the settings in the respective screens, and then click [Next]. Click [Start] in the displayed screen.
9. Click [Exit].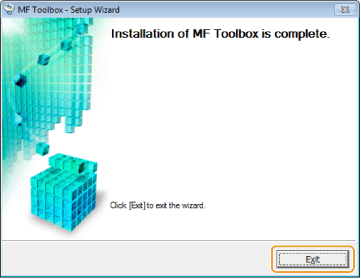
* The software for which the check box was selected in step 4 is installed. Follow the on-screen instructions.
10. If you selected Manuals in step 4, installation of the manuals starts.
Follow on-screen instructions to install the manual.
11. When the following screen appears, read the displayed information, click [Accept] or [Do Not Accept], and then click [Next].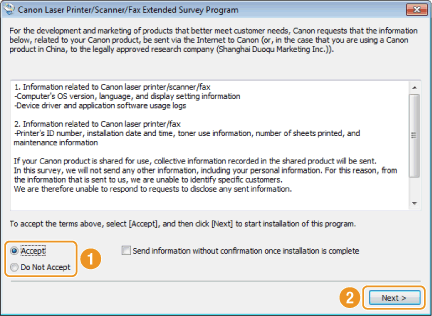
NOTE
If you select [Accept]:
- The Product Extended Survey Program (the program to investigate the state of usage) will be installed. The Product Extended Survey Program is the program to send the information related to the usage of this machine to Canon every month for ten years. Any other information including your personal information is not sent.
- You can also uninstall the Product Extended Survey Program. For more details, see "MF Driver Installation Guide".
12. Confirm that the applications are selected [  ] under [Install] and click [Next].
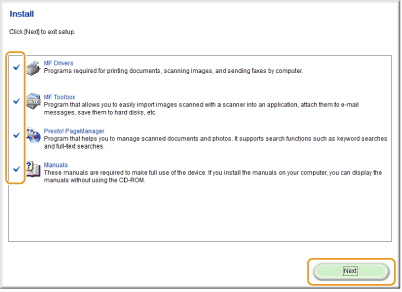
The options to be displayed differ depending on your country or region.
13. Restart your computer.
(1) Select the [Restart Computer Now (Recommended)] check box.
(2) Click [Restart].
Remove the CD-ROM (or DVD-ROM) once this screen appears.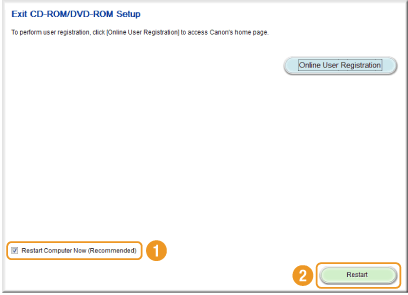
The options to be displayed differ depending on your country or region.
USB Cable Connection (Only when Connecting with USB)
1. Remove the cap that covers the USB port on the back side of the machine.Pull the string forward to remove the cap, as shown below.
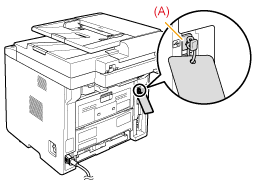
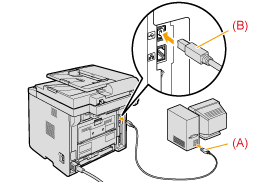
2. Connect the USB cable.
- Connect the flat end (a) to the USB port on the computer.
- Connect the square end (b) to the USB port on the machine.
NOTE
If a dialog box is displayed:
- Follow the on-screen instructions and complete installation.
Checking the Installation Results
Check if the MF drivers, MF Toolbox, and e-Manual are installed correctly.Check if the following icons are displayed for the installed applications.
NOTE
About Icons That Are Displayed:
- Icons for each driver may be displayed separately or only representative icon may be displayed depending on the operating system.
| Software | Location | Icon |
| Printer driver | [Printers and Faxes], [Printers], or [Devices and Printers] folder |  |
| Fax driver | [Printers and Faxes], [Printers], or [Devices and Printers] folder |  |
| Scanner driver | [Scanners and Cameras] or [Scanners and Cameras Properties] folder |  |
| MF Toolbox | Desktop |  |
| e-Manual | Desktop |  |
Installing the Drivers Downloaded from the Canon Homepage
This section describes the outline of the procedure to install the drivers/software downloaded from the Canon homepage. For the procedure to download drivers/software, refer to the download site of the Canon homepage.
1. Decompress the downloaded file.
2. Open the [DRIVERS] folder, and then double-click [Setup] or [Setup.exe]
If the [User Account Control] screen appears, click [Yes] or [Continue].
3. Follow the on-screen instructions.
Related information
Applicable Models
- i-SENSYS MF6140dn
- i-SENSYS MF6180dw